 Rating 5/5


Installation of the Star Water Filter® gravity water filter
Installing your Star Water Filter® filtration system is simple, provided you follow the different steps carefully. Read the following instructions before assembling your system.
Step 1
Unpacking your Star Water Filter® system
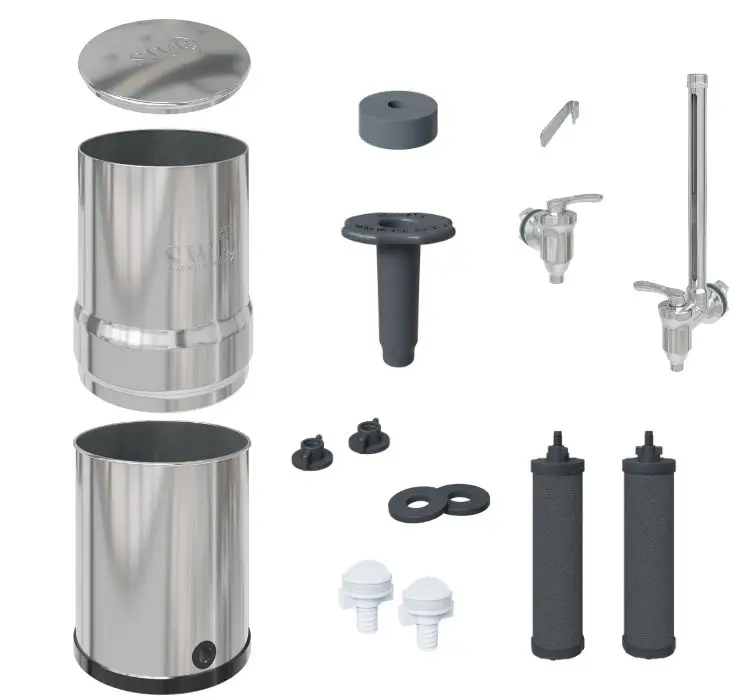
When unpacking your system, check that all the necessary components are present:
- the two chambers in your chosen finish;
- the matching lid;
- the cylindrical non-slip ring to be placed under the lower chamber;
- the standard stainless steel tap or, if you selected this option, the level-view tap corresponding to the size of your system;
- for the tap: two silicone washers, two stainless steel washers and the tightening nut;
- two screw-in plugs for the unused filter openings;
- two Ultimate Star Filter® filter elements, each supplied with two silicone washers and a wing nut;
- the priming washer and the priming nipple;
- the stainless steel Starclip;
- if ordered, the riser base corresponding to the size and finish of your system.
Step 2
Cleaning the equipment before installation
Before assembly, clean the chambers and the tap using lukewarm water and household vinegar.
Step 3
Fitting the tap
Fit the tap to the lower chamber.
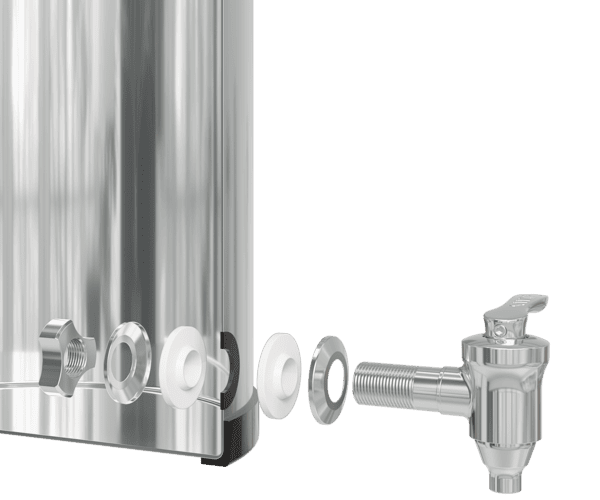
Whether you are using the standard tap or the level-view tap, the fitting principle is the same:
- unscrew the tightening nut and remove one stainless steel washer and one silicone washer;
- insert the tap into the opening at the bottom of the lower chamber, leaving one stainless steel washer followed by one silicone washer on the outside;
- inside the chamber, fit one silicone washer followed by one stainless steel washer;
- screw the tightening nut into place.
Step 4
Fitting the Ultimate Star Filter® filter elements
Before installing the filter elements in the upper chamber, they must be properly primed. This applies both to new filters and to filters being put back into service after a period of storage. Please consult our filter priming and start-up guide before continuing.
Installing the plugs
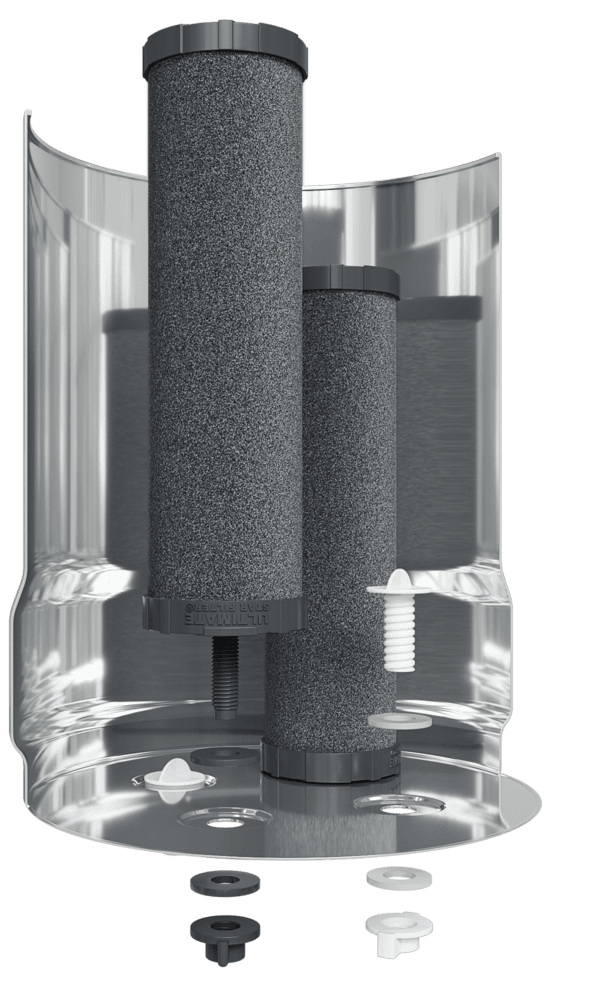
Install the two plugs in the openings that will not be used for filters. Ideally, place them in two diagonally opposite openings. A silicone washer must be positioned on each side of the chamber wall. Tighten by hand without overtightening.
Place the upper chamber on a clean cloth to protect and stabilise it.
Installing the filter elements
For each filter element:
- place one silicone washer onto the threaded stem;
- insert the stem into one of the available openings in the chamber;
- place the second silicone washer onto the stem, on the outside of the chamber;
- tighten the wing nut by hand.
Repeat this procedure for each filter being installed.
Step 5
Assembling the two chambers
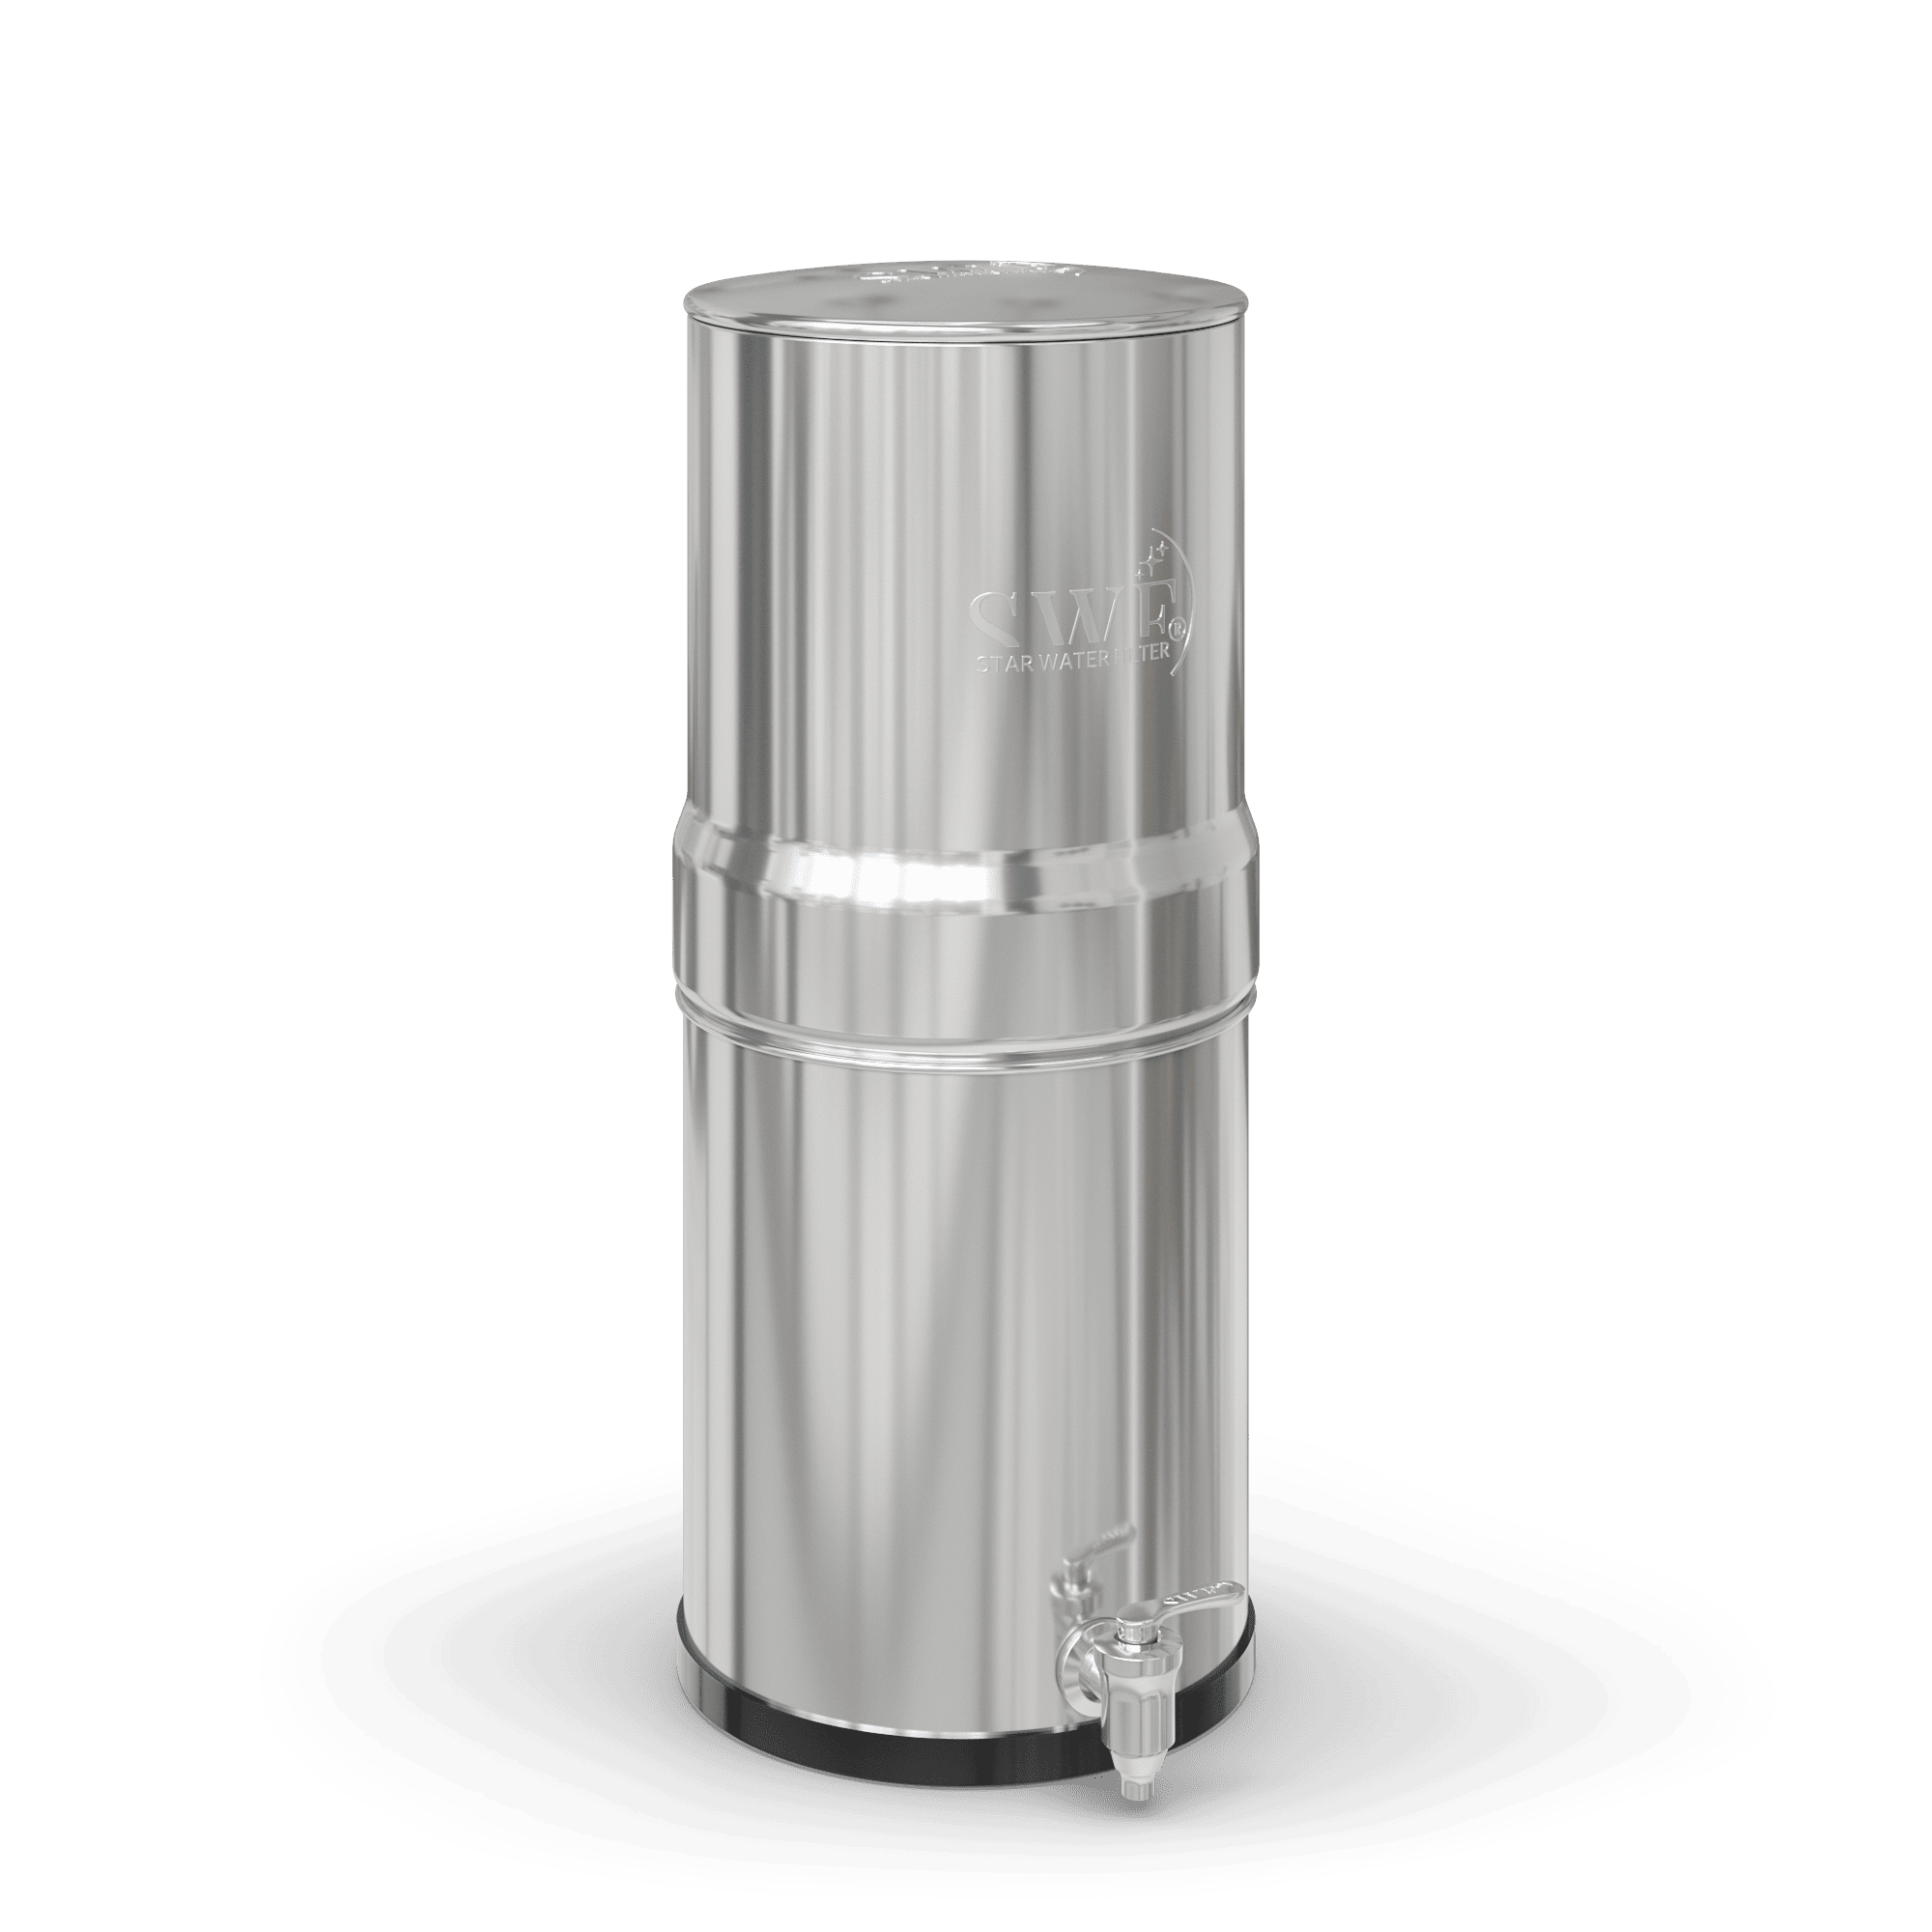
Place the lower chamber, fitted with its tap and stability ring, on a flat surface or on the riser base if you use this accessory.
Attach the Starclip to the rim of the lower chamber. It allows the necessary air circulation between the two chambers.
Place the upper chamber onto the lower chamber, then fit the lid.
Step 6
Before first use
Before drinking the filtered water, run two complete filtration cycles. These first cycles help remove any residues associated with the manufacture and initial use of the filter elements.
The water from these first two filtration cycles can, for example, be used to water plants. The filtered water can be consumed from the third filtration cycle onwards.
For optimum use of your system, also see our guide How to use your Star Water Filter® properly .
Intended use
The Star Water Filter® system is a gravity-fed filtration device designed for stand-alone domestic use. It is not designed to be connected directly to the water supply or incorporated into a fixed installation.
It may be used with tap water or with water intended for consumption whose origin and quality are known, provided that the precautions stated in the instructions are followed.
The system should not be considered a sole or automatic treatment solution where microbiological, chemical or accidental contamination of the water is suspected.
Start-up precautions
The Star Water Filter® filtration system operates independently by gravity, without connection to a fixed water treatment or distribution installation.
Before consuming filtered water, complete all the required steps: assembly, priming, rinsing and start-up.
Priming, rinsing, cleaning and maintenance of the system and filter elements must be carried out using suitable drinking water in order to minimise the risk of contamination.
Do not use the system with microbiologically unsafe, suspect or unknown-quality water without suitable prior treatment and confirmation that the water is fit for consumption.